How to Repair Wireless Network After Ubuntu Update

There is nothing worse than a laptop with out wifi. No wireless network takes the portability away from your laptop.
After the last distribution upgrade going from Ubuntu 11 to 12 I lost my wireless network capability. I searched the internet for answers and found many; but not many helpful. So I have put the following together for that very reason.
The driver for my wireless was not working so I had to reinstall the wireless drivers for my laptop. First things first. You need to dust off that ethernet cable and plug one end into the back of your internet router and the other into your ethernet port. Make your ethernet port ready by typing the following into your terminal:
sudo ifup eth0
Eth0 is usually your network card for a wired connection. If this command does not work try sudo ifup eth1 instead. Computers understand the 0 as the actual first and 1 as the second and so forth. Make sure you have a connection by opening your internet browser.
Download Wireless Drivers here: http://www.orbit-lab.org/kernel/compat-wireless-3-stable/v3.1/compat-wireless-3.1.1-1.tar.bz2
Or you can go to the main page found here to choose the latest stable release: http://linuxwireless.org/en/users/Download/stable/#compat-wireless_3.1_stable_releases
After downloading, unpack the source by typing the following command into your terminal:
tar -xf /path/to/compat-wireless-version
Getting ready to install by typing the following (each line is separate command):
cd /path/to/compat-wireless-driver-version
./scripts/driver-select <driver-name>
make
sudo make install
sudo make unload
Type the following command into terminal:
sudo /etc/init.d/networking restart
Alternatively you can just reboot the computer.
Identify Your Network Controllers
Type the following command into your command line terminal to determine what type of network controller you have and the device driver: lspci
Now examine the output. Look for something similar to the following lines I took from my laptop. The bottom two lines are the device driver identification. If you can see this type of output then your device driver is installed. On to the next step of configuring your network.
02:00.0 Network controller: Atheros Communications Inc. AR9285 Wireless Network Adapter (PCI-Express) (rev 01)
Subsystem: Hewlett-Packard Company U98Z062.12 802.11bgn Wireless Half-size Mini PCIe Card
Control: I/O+ Mem+ BusMaster+ SpecCycle- MemWINV- VGASnoop- ParErr- Stepping- SERR- FastB2B- DisINTx-
Status: Cap+ 66MHz- UDF- FastB2B- ParErr- DEVSEL=fast >TAbort- <TAbort- <MAbort- >SERR- <PERR- INTx-
Latency: 0, Cache Line Size: 64 bytes
Interrupt: pin A routed to IRQ 17
Region 0: Memory at d0100000 (64-bit, non-prefetchable) [size=64K]
Capabilities: <access denied>
Kernel driver in use: ath9k
Kernel modules: ath9k
After this procedure open Ubuntu Software Centre application then download and install WICD Network Manager. The reason for this is the original network manager which is found in system settings network is useless after release update. WICD works awesome and can be configured to have your wired network and wireless network ready for when you need them without the hassle of taking one down then bringing the other up. The application does that for you.
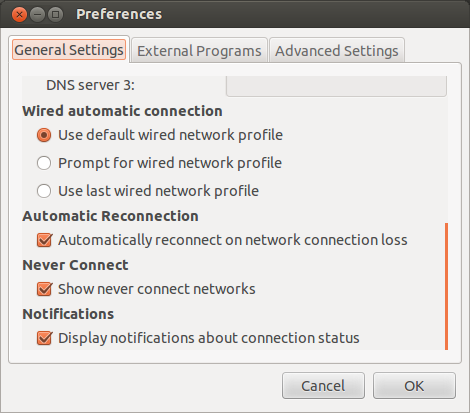
Configure Wireless Network With WICD Network Manager
- Click on WICD Network Manager icon
- WICD will scan for networks. You need to know you network name or SSID.
- Scroll down to find your network if it is not at the top of the list.
- Once your network is identified click on "properties" button
- You will need the password or key to complete this step.
- Click the "okay" button to complete.


Wifi Settings
Network configuration during boot up
Another problem you may have encountered as well since the update is the “waiting for network configuration” during boot up.
The fix for that is open up your favorite text editor or just plain old vim. Type the following command into your terminal like this:
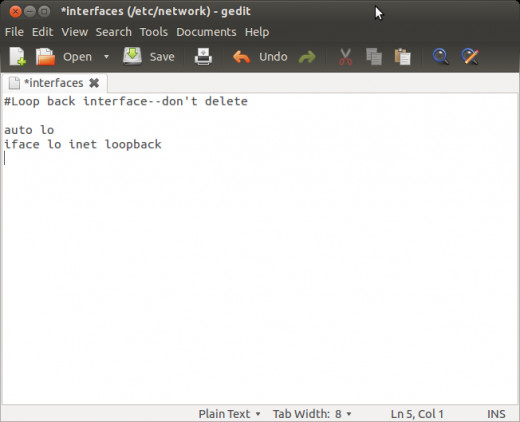
sudo gedit /etc/network/interfaces
For the sake of this tutorial we will use gedit which is much more intuitive than vim. You file should look like this:
auto lo
iface lo inet loopback
If there is anything else just comment it out with a hash mark # in front of the line. This will make the system ignore it. If you are an advanced user you can alternatively delete any unnecessary lines in this file. This file needs to be simple. This will stop the waiting for network during the boot time splash screen caused by the last upgrade. Now save the file and reboot computer.
Network Interfaces file
Related

Trying to connect to a wireless network and it keeps asking for a PIN? How to fix it.

OM2P Open-Mesh 802.11 g/n Wireless Mesh WiFi Mini Router Review

How to Use Router Settings to Fix Slow Wireless

What Is a 5G Wireless Network and What Makes It Better Than 4G?
, What to Use")
6 Reasons Why You Should Secure Your Unsecured Wi-Fi Wireless Network, What Can Happen (Such as Porn), What to Use


